Category: Bosses & Enemies

Dec 09 2014

Gearing up at Level 100

The Warlords of Draenor expansion is underway!

With Highmaul Looking for Raid wing 1 opening today, I thought I’d take a look at the various ways to gear up your characters for those of you looking to advance into raid content. Whether the goal is moving into Mythic, Heroic, Normal or even LFR, progressing your gear at the cap is something many players will want to do. There are a ton of ways to gain gear this expansion including many new ways just introduced through Garrisons.

Questing

Questing in high level areas (Nagrand and level 100 areas) often rewards higher item level blues. Remember that with the new random roll system, you may get lucky and have any of these roll to a superior reward of epic quality! Get started on your end game gearing by working through Nagrand‘s quests.

You can increase your odds for these upgrade rolls by building a War Mill (Horde) or Dwarven Bunker (Alliance) in your Garrison.

Rare Mobs

Draenor is filled to the brink with rare mobs, many of which have a very short respawn timer and have a chance to drop blue gear that might be useful to your character. The item level of the blue gear varies depending on the zone and the level of the mob, so for the best chance at useful upgrades for a level 100 you want to look at rares in Nagrand and level 100 questing areas, which can drop ilvl 615 and 620s.

However, you only have a chance to receive loot the first time you kill a mob on that character, so you basically only get one chance at the loot. If you’re unlucky and it doesn’t drop, camping the respawn for repeat kills will not help you.

Dungeons

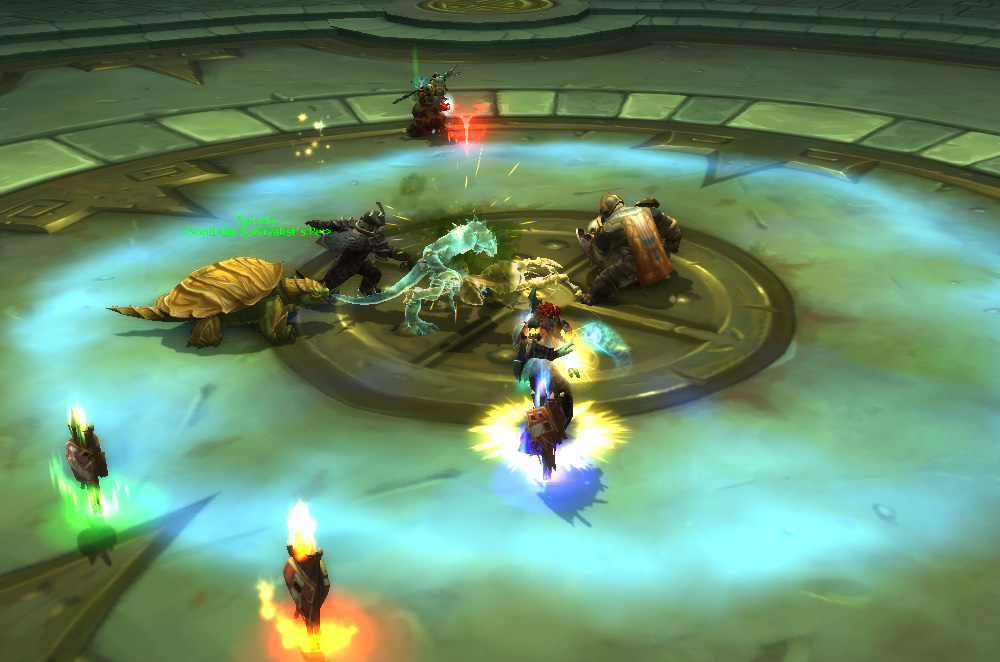
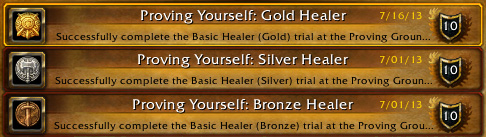
One of the simplest avenues for upgrades is to jump into five man dungeons. Normal mode level 100 dungeons award ilvl 615 gear, which will at least prepare you for heroics. Heroic dungeons drop ilvl 630 gear which can roll “warforged” and upgrade to ilvl 636 if you’re lucky. Keep in mind that in order to do heroic dungeons, you will need ilvl 610 and must beat Proving Grounds at at least a Silver level in order to queue in your desire spec.

Challenge Modes

Challenge Modes are a particularly lucrative source of gear, and you only need to finish them – not earn a medal time.  For each Challenge Mode daily you complete, you will receive a Challenger’s Strongbox which contains a random ilvl 640 epic that is appropriate to your spec. The epic is a guaranteed drop in each box and has a chance to roll warforged for a higher item level and a chance at a gem socket or tertiary stat bonus.

Legendary Ring Chain

This expansion’s first legendary is a ring, which starts at ilvl 640 and upgrades multiple times. Everyone who desires to put in the time and effort can work on acquiring one of these rings. The first two steps of it are fairly easy to get, as they only require five man content:

The first ring is item level 640 and requires you to complete the Skyreach dungeon on either normal or heroic and loot an item from the final boss. The second ring is item level 680, and requires you to complete four specific heroics and gather about 5,000 Apexis Crystals.

(further iterations will require raiding)

PvP

If you like PvP, you can hop into Battlegrounds or Ashran to purchase ilvl 620 gear via Honor Points.  If you like more competitive PvP, you can get ilvl 660 via via Conquest Points which can be earned via daily randoms, ranked play, and various dailies/weeklies in Ashran and in Nagrand.

Crafted Gear

Many crafting professions this expansion can create ilvl 640 epic pieces with random stats. This includes Blacksmithing (plate armor), Leatherworking (mail & leather armor), Tailoring (cloaks & cloth armor), Inscription (weapons, off-hands, trinkets), and Jewelcrafting (rings & necks). Engineers can also make Goggles, but these can only be worn by other Engineers. You are limited to wearing three crafted pieces — combined across all profession crafting — at a time, but having all three can be a huge boost to your item level.

The recipes for these pieces are purchased through the crafter’s Garrision profession building, and each piece require a large amount of materials that are made via daily cooldowns and work orders, which slows the amount of time it takes to acquire enough materials to make these pieces. For this reason, crafted gear can be expensive on the auction house right now. However, since they are BoE, there is nothing to stop you from setting up a Garrison on an appropriate alt and making them for yourself (or begging a kindly guild mate)!

Each profession also makes items to reroll the stats on these items in the event they are not ideal. These pieces can also eventually be upgraded to higher item levels with more costly materials.

Garrison Mission Rewards

When your Garrison followers start reaching item level 615, you will begin to receive missions that reward ilvl 630 loot for successful completion. When your followers hit ilvl 630, they can start bringing you back raid-quality epics.

Garrison Salvage Yard

Build a Salvage Yard in your Garrison. When you’ve upgraded it to level 3, you will start receiving Big Crates of Salvage any time your followers successfully complete a level 100 mission. These boxes have a chance to contain random ilvl 665 epics. The more missions you successfully complete – the better your odds!

Apexis Purchase

You can also purchase ilvl 630 gear using Apexis Crystals. Some of these also require reputation with corresponding factions.

Keep in mind that Apexis Crystals also used to purchase Seals of Fate used in raid bonus rolls and are required for your Legendary Ring quest, so you may find that it is more useful to save these for other purchases.

Molten Core

Until January 5th only, as part of the 10th anniversary of WoW celebration, a scaled up version of Molten Core is available through the Looking through Raid finder. Completion awards a Corehound Mount and an ilvl 640 hat appropriate to your class/spec.

You do need ilvl 615 in order to queue for the special MC raid.

World Bosses

There are also several world bosses in Warlords that drop raid quality loot. Right now, you can look for Tarlna and Drov in Gorgrond, which have ilvl 650 loot tables and give you a chance at loot once a week.

Rukhmar will be added in the future, and will drop ilvl 665.

World Drops & Black Market Auction House

And, of course, if you’re insanely rich, you have a couple more options. You can keep an eye on the BMAH, which can have some raid quality gear available for purchase (this includes Mythic quality!) and there are also BoE world drop epics out in the world which may find their way to the regular auction house for very hefty sums.

Lower raids

And, of course, you can work your way up through raid tiers, starting with Highmaul LFR, through normal, heroic and then Mythic.

The first wing of Highmaul LFR opens today and is pretty quick and painless.


GOOD LUCK GUYS!

Jan 15 2014

Glory to the Orgrimmar Raider [Guide]

The Glory of the Orgrimmar Raider is the raiding meta achievement for Tier 16.  Unlike prior tier’s metas, this one does not require any Hard Mode kills and can even be completed on Flex mode for ease and speed.

Completing it rewards the very badass Spawn of Galakras flying mount.


Boss:  Immerseus

Achievement:

No More Tears
Defeat Immerseus after killing 10 Tears of the Vale in Siege of Orgrimmar.

How it works:

If you manage to keep the corrupted blobs away from Immerseus’ pool while he’s submerged for the entire phase, they will turn into Tears of the Vale.

The way to do this achievement is to have particular people in the raid responsible for chain CCing the blobs for the full 30 second submerge, using roots, snares, stuns and knockbacks (and deathgrip). As soon as the boss reappears and the blobs transform into Tears, the raid needs to quickly nuke them.

It is recommended that DPSers unequip their cloaks for this fight because the procs will kill the blobs they are working on.

You can do this across multiple phases, so be careful not to kill the boss until you’ve gotten all ten down.


Boss:  Fallen Protectors

Achievement:

Go Long
Transfer the Mark of Anguish to at least 5 unique players over a total of 200 yards or more during a single Desperate Measures phase, and then defeat the Fallen Protectors in Siege of Orgrimmar.

How it Works:

This achievement is completed during Desperate Measures, cast by He Softfoot (the rogue).  During this time, he will cast Mark of Anguish on a raid member and your goal is to pass it around the raid, covering enough distance and unique people to meet the criteria.

There are several different ways to complete this achievement.  You can form an actual ring or a chain around the room, or you can just make sure everyone spaces out as best as they can, and then each person try to pass to to the person furthest away from them (such as melee to ranged, back to melee, etc).  The range on passing is 40 yards so unless everyone is exactly 40 yards apart, it may take more than five passes to complete.  You may want members who have already taken the Mark to stand in the middle of the room so people know not to pass to them, and  stick to passing to the people at the edge of the room.

Note that there is a five second cooldown on the passing ability that will slow its movement through the raid.


Boss:  Norushen

Achievement:

None Shall Pass
Defeat the Amalgam of Corruption without allowing any unleashed corruption to fuse with it in Siege of Orgrimmar.

How it Works:

The small adds that spawn from the DPS completing their challenges throw little orbs at the boss which must be avoided t to complete the achievement.  You can either intercept these orbs, or just prevent them from occurring.

The easiest way to complete this achievement to just avoid sending any DPS into their trials, instead sending only tanks and healers, and having the DPS tunnel the boss.  This will prevent little adds from spawning entirely, and you will not need to worry about intercepting the unleashed corruptions as a result.

Alternatively, just make sure you have one person assigned to stand in front of each little add to make sure that they are between the add and the boss, so any orbs thrown hit them before the boss.


Boss:  Sha of Pride

Achievement:

Swallow Your Pride
Defeat the Sha of Pride in Siege of Orgrimmar after no player has gained Pride from Manifestations of Pride while Norushen is alive.

How it Works:

Manifestation of Pride is the large add that spawns in the back of the room during this boss fight.  It applies Pride to players in two ways:  with Mocking Blast and again when it dies.

The way to avoid Pride and complete this achievement is twofold: One, make sure that all Mocking Blast casts are immediately interrupted.  The second way is to make sure that when the add dies, the two nearest players are the ones  with the buff Gift of the Titans.


Boss:  Galakras

Achievement:

The Immortal Vanguard
Defeat Galakras without having allowed a single friendly NPC to perish in battle in Siege of Orgrimmar .

How it Works:

This achievement is really easy to get incidentally.  Just make sure you fight the boss away from the little NPCs to prevent them from joining the fight and getting themselves hurt and you should get this achievement by virtue of successfully completing the encounter.


Boss:  Iron Juggernaut

Achievement:

Fire in the Hole!
Stomp on 6 superheated Crawler Mines and then defeat the Iron Juggernaut in Siege of Orgrimmar.

How it Works:

Crawler Mines become superheated when a laser is kited over them in the boss’ second phase.   Just make sure the person responsible for mine stomping during this phase prioritises getting the Superheated Crawler mines (and those kiting the laser make sure to hit the mines).

The boss’ berserk timer allows for three of these phases before he enrages, so need at least two per phase, and you need to make sure DPS doesn’t kill him before you’ve gotten all six.


Boss:  Kor’kron Dark Shaman

Achievement:

Rescue Raiders
Rescue a set of caged prisoners, a group of unwilling combat participants, and Ji Firepaw before defeating the Kor’kron Dark Shaman in Siege of Orgrimmar.

How it Works:

This achievement actually involves Dark Shaman’s trash rather than the encounter itself.   The goal is to clear all the trash in the area without killing any of the caged prisoners or unwilling combat participants (which will be neutral orcs and theramore citizens).  Ji Firepaw will be credited automatically just by killing the mobs around him.

The easiest way to do this is to CC the neutral mobs and pull the hostile NPCs far, far away so you don’t accidentally kill them.  They only have a small amount of health points and can die from anything from incidental AoE to cloak procs.

Kill the Jailer in the Orgrimmar bank to get the key to release all the caged prisoners.

Once every one is free, you are safe to kill the boss for the achievement.  It will be credited after the Shaman die.


Boss:  Nazgrim

Achievement:

Gamon Will Save Us!
Defeat General Nazgrim while Gamon is alive and participating in the battle in Siege of Orgrimmar.

How it Works:

This achievement is another that is very easy to earn incidentally.  Free Gamon from where he is chained up by the catapults before the Drag after you’ve cleared trash and are ready to fight the boss.

Gamon will join you in the boss fight.  He takes very little damage from anything except War Song.  All you need to do is beat the boss normally, doing your best to avoid War Songs, and healing him as much as possible when you do get them so he can survive any subsequent ones.

Note that if you wipe on this boss, Gamon will die, and that is your chance for that raid and you will either need to wait until next week (for normal/heroic) or requeue for flex.


Boss:  Malkorok

Achievement:

Unlimited Potential
Transform a Corrupted Skullsplitter into a Corrupted Amalgamation and then defeat Malkorok in Siege of Orgrimmar.

How it Works:

The Corrupted Skullsplitter is a mob you will normally pass on the way to Malkorok’s room.  Instead of killing it, carefully skip it and clear the rest of the trash on the way there.  Once the route is clear, grab the Skullsplitter and pull it into Malk’s room.  Once there, CC it or offtank it to the side, being careful not to kill it.

When the boss casts Breath of Y’Shaarj, make sure the mob is hit by it.  You will know it worked because it will transform into a Corrupted Amalgamation.  As soon as this happens, nuke the mob and then kill the boss as normal.


Boss:  Spoils of Pandaria

Achievement:

Criss Cross
Complete the Spoils of Pandaria encounter in Siege of Orgrimmar without any raid member defeating both a Mantid and a Mogu enemy.

How it Works:

This achievement requires the raid to be split into Mogu and Mantid teams instead of Left/Right.  After completing their assigned room, the teams must cross up using the chains and drop down on the other side so do the same chest type again.  The chains take a full 20 seconds between each person (10 to pull up, and 10 seconds to drop back down), so it takes a lot of time for the raid to switch sides, so you need to split up that time between each timer.

Put the melee on the Mogu team and ranged on Mantid.  Kill the green boxes and the one boss first (using hero/bloodlust), then work on the mediums and the smalls.

When you’re nearing the end of your boxes and just have smalls left, start sending up players from your team on the chain to wait in the middle.  It’s probably better to send the lower DPS first.  Leave at least one DPS in each room to hit the lever, but wait until you have <5 seconds left on the timer before pulling it, giving yourself as much time to transfer as many people as possible to the middle.  Once the levers are hit and the timer is reset, people can drop down on their new sides while you finish transferring the remaining raid members, but DO NOT open any boxes until everyone s on the correct side.

Once everyone has switched sides safely, open the boxes normally and finish the encounter.


Boss:  Thok the Bloodthirsty

Achievement:

Giant Dinosaur vs. Mega Snail
Open the Thrice-Locked Cage during the Thok the Bloodthirsty encounter in Siege of Orgrimmar, and then allow its inhabitant to feast upon Thok’s corpse once you have defeated the encounter.

How it Works:

In Thok’s room, there is another cage that is usually ignored containing a large snail.  It is found on the leftside of the hallway as you venture towards Thok’s arena.  It must be opened three times before the snail is released.

When the first Kor’kron Jailer dies, instead of opening the usual cage, open the snail one instead.  An additional Jailer will spawn, which is killed, and use that key to open the correct cage to proceed as normal.  Do this during each kite phase, so you are effectively killing two jailers each time.  Get the boss as low as possible.

After the third transition, unlocking the snail’s cage will this time release the snail.  It will beeline for Thok – make sure you stay away while you kill the boss.  Once the boss dies, the snail will eat his corpse and credit will be granted to the raid.


Boss:  Siegemaster Blackfuse

Achievement:

Lasers and Magnets and Drill! Oh My!
Defeat Siegecrafter Blackfuse without destroying each of the following weapons in Siege of Orgrimmar: Deactivated Laser Turret, Deactivated Electromagnet, Deactivated Missile Turret, Disassembled Crawler Mines

How it Works:

This achievement is exactly how it sounds, and can be completed over multiple kills.  The quickest way to do it requires just two kills: First, do one kill where the conveyor belt players kill nothing but Missiles — which is a common strategy — netting you credit for Magnets, Lasers, and Mines.  On the next kill, keep the Missiles alive by instead killing either the Mines or Lasers.

However, if you are completing this achievement on Flex mode and have good gear, you can instead opt to earn the achievement in ONE kill by ignoring the conveyor belt entirely.


Boss:  Paragons of the Klaxxi

Achievement:

Now We are the Paragon
Defeat the Paragons after assuming the mantle of three different Paragons in Siege of Orgrimmar.

How it Works:

This is a personal achievement and requires three separate kills.  The three mantles each person must earn are the buffs received by clicking on the dead Paragons.  Each buff is only available to particular roles, can only be picked up by one raid member at a time, and only one buff can be picked up per player per fight.  There are four options for DPS, two options for healers, one option for tanks, and two paragons whose buff can be assumed by anyone.  This means that over the course of three kills:

  • Your DPS will need to pick three different DPS mantles.
  • Your tanks will need to get the tank buff, as well as the two generic ones.
  • Your healers will need to do both of their’s, plus one of the generic ones.

Work out in advance who needs which buffs and try to assign people Paragons so everyone gets a new buff for each encounter.  If you have multiple people with offspecs for other roles, you can have people swap roles to increase their options.

Note that if you do this on flex, you can complete this achievement on the same night by just re-queuing for that wing three times.


Boss:  Garrosh Hellscream

Achievement:

Strike!
Kill 18 Kor’kron Warbringers with a single Iron Star and then defeat Garrosh in Siege of Orgrimmar on Flexible, Normal, or Heroic difficulty.

How it Works:

Kor’kron Warbringers are the adds that spawn in phase 1 of this encounter.  Typically they are cleaved down by the DPS and finished off by an Iron Star, the large fiery wheels that roll across from the edges of the room.  All 18 of the adds must be killed by the same Iron Stars.

To complete this achievement, you will need to hold off DPS until you have built up 18+ Warbringers.  This will be a lot of damage on the add tank, so cooldowns may be required.  Get all the adds to low health (~20%) to ensure the star wil kill them, and make sure they are hit and killed.

Once you have successfully killed all 18 with a single Iron Star, you complete the encounter like normal.  Credit will not be granted until the boss is downed.

Jul 20 2013

Proving Yourself in Proving Grounds

This PTR build of patch 5.4 introduced a long-awaited feature to the game: Proving Grounds!  Proving Grounds are solo scenarios where a level 90 player can test their skill in their chosen role against wave after wave of enemies that get progressively harder.

•  As a DPS, your job is to kill the mobs before the next wave spawns.  It’s just you and your toolbox of spells and abilities to burn them down, interrupt their heals, and keep yourself alive.

•  As a tank, your job is to protect your NPC healer by picking up the mobs as best you can, interrupting them, and using your own cooldowns to survive.

•  As a healer, your job is to keep your party alive.  Your party is a team of NPCs – a warrior tank, an assassination rogue, a hunter and a mage.  The AI is pretty smart — they are good about interrupting and focus firing — while still being realistic in the sense that they are occasionally being slow to get out of fire or meandering out of your healing range.  You’ll need to do a lot of healing and dispelling here.

If you fail in your role objective, you get a failure message and the mobs despawn and you have to talk to the NPC to start again at wave 1.  If you get “killed,” you are actually just reduced to 1 healthpoint – so no death repair bills!  You do take wear-and-tear durability damage, though, and there is an NPC inside the instance who can repair you.

Healer PG

Goals

Proving Grounds can serve several useful functions:

  • First and foremost: it is something fun to do!
  • It gives new players a safe but real-time environment to practice their skills and improve their play.  Whether you’re new to the game or just new to a role, PGs are a wonderful place to hone your skills without worrying about irritating or — worse — killing four other players in the process.
  • If gives players a place to test out particular talents, glyphs, as well as fiddle with their addons and keybinds.

Gear Scaling

To make sure Proving Grounds are a challenge of skill and not of who simply has the best gear, all equipment is scaled down in a similar fashion to Challenge Modes.

  • Gear scales to ilvl 463
  • Gems do not scale
  • Set bonuses do not count

Unlike Brawler’s Guild where players can hit a ceiling on their success because their gear is subpar (or get further because great gear gives them more margin for error), the equalised equipment means ranking accurately reflects true skill.  Of course, if you’re exclusively a tank or healer, you probably can’t do Brawler’s Guild at all.

You can use flasks and foods, but not potions; they say they didn’t want you to have to bring stacks and stacks of pots just to make it through.  There is a soulwell for health cookies, though!

There is also a reforger NPC in case you need to make any gear tweaks, and a vendor who sells  Tomes of the Clear Mind so you can adjust your talents and glyphs as much as you need.

Tuning

First the obligatory disclaimer – All of this can change!  Proving Grounds are a brand new feature and it’s possible Blizzard may shift their goals with what they want with them.  Additionally, right now the tuning on the PTR is really easy — far below what I was told was intended (and what I outlined below). It is likely untuned right now, but being the PTR I imagine they will be tweaking them quiet a bit over the next month or so.  Give them a try, leave feedback on the tuning whether you prefer it harder or easier.

You begin with bronze mode.  The plan is for bronze to be tuned to a player ready to step into heroic 5-mans, so this should be easy for just about everyone.

After you beat bronze, you can step into Silver.  If you’re a normal mode raider, you should be able to make it through this level, with maybe some difficulties in the final waves.

After that comes Gold.  Beating gold is intended to reflect comparable skills to a player that is ready to raid heroics.  Expect to use your whole toolbox to make it through Gold.

After you beat Gold, you are eligible to try Endless mode.  Endless mode, as the name implies, has unlimited waves of increasing difficulty.  Each wave does a percentage more damage and has an equal percentage more health than the one before it.

Your furthest wave will be tracked so you can come back try to beat your high score later, and so you can compete with your friends.  Although there are no in-game leaderboards like for Challenge modes, this information is tracked in your character statistics and can be pulled up in the armory, so expect third party sites to run rankings eventually.

Rewards

There are achievements for reaching each rank in each role, as well as surviving 20 waves into Endless.  There will be titles, as well.  “[Name] the Proven [Healer / Tank / Damage Dealer]” probably earned by completing Gold for a given role.

Perhaps later other rewards will be implemented, but that’s it for now.

I got the opportunity to test Proving Grounds a couple weeks early thanks to an awesome dev (thanks Celestalon), but now they are a little more polished and available for everyone to try.  Just speak to your class trainer* or the NPC in the Temple of the White Tiger in Kun Lai Summit to be sent in.


* NYI this build – go to Kun Lai

Outside Resources


Mar 14 2013

Tziva’s Guide to Hoarding Dinosaurs

Patch 5.2 is out and it offers a lot of fun new content for players.  I think I speak for everyone awesome when I say that the most pertinent of these new things is: dinosaurs.  We get a lot of them, which is good, because there is no such thing as too many dinosaurs.  So this is my guide to acquiring new dinosaurs because if you are even remotely cool, this has now become the most urgent goal in your life.

If you’re just looking to chill with some prehistoric badasses, but suspect you can’t handle the coolness of owning your own, Blizzard has given us an entire island full of nothing but dinosaurs of all sizes and varieties: The Isle of Giants.  It is covered with elite adult and young triceratops direhorns, tyrannosaurus rexes devilsaurs, and pterodactyls skyscreamers in a rainbow of colours.

Okay, but now on to the important question: how do you cash in on this stuff?


Dinosaur Mounts

So of course you want a dinosaur mount.  Everyone wants a dinosaur mount.  Lucky for you, there are a lot of new dinosaur mounts to choose from.

Direhorns

The easiest direhorn mounts to acquire drop from the elite Zandalari Warbringers that spawn around Pandaria.  At around a 5% drop rate, you will likely need to kill a bunch of these, but luckily they spawn pretty regularly (around every 30 to 60 minutes) and drop other awesome things to soothe your poor, dinosaurless soul.  These Warbringers are trolls riding the dinosaurs you’re trying to steal, and come in a slate (pale blueish), amber (greyish yellow), and jade varieties (bright greenish).  The mount on their loot tables matches the dinosaur they are currently riding; you won’t ever get a slate mount from a dude sitting atop a jade.  Don’t be distracted by the Zandalari Scouts that patrol nearby; they don’t drop the mounts.  Bring a friend or two to help you with these tough elites; the Warbringers can be duo’d if you know how to handle their abilities, but are very difficult to solo if you’re not a well-geared tank or a pro hunter.

Slate Direhorn

The other direhorn mount is a cobalt blue, and is a rare drop from the new world boss Oondasta.  If your heart is set on this one, grab one hundred of your closest friends and cross your fingers.

If you’re a raider, check out the second boss in Throne of Thunder named Horridon.  Not only is he absolutely adorable to look at (little periwinkle feets!), he has a rare chance to drop a blue & white direhorn mount.

Finally, if you love dailies or at least are willing to slog through them for a triceratops, you can look forward to snagging your own crimson (if you’re Horde) or gold (as Alliance) direhorn for reaching exalted with your new faction on the Isle of Thunder.  The new factions are the Kirin Tor Offensive for Alliance and Sunreaver Onslaught for Horde.

Raptors

The new raptors come in black, red, green and white.

Most people will probably want to focus on the black, red, and green varieties, as these do not require insanity and huge amounts of time to acquire like the white one.  Elites mobs on the The Isle of Giants (all of them except the Zandalari Dinomancers) have a small chance to drop the Primal Egg you are seeking.  The smaller elite dinosaurs on the island can be solo’d by most classes, although the bigger devilsaurs and triceratops may require a couple people, so getting your egg should just be a matter of getting enough kills under your belt.  Three days after getting your Primal Egg, it will hatch into a Cracked Primal Egg and inside will be a random raptor mount in one of these three colours.  The mount is guaranteed from the egg, but it may take you awhile to get all three types since you can get duplicates.

While you’re farming your Primal Egg, you will find that all these mobs also drop a few Giant Dinosaur Bones with each kill.  Save these, because for the low, low cost of only ten thousand bones (okay, 9999 actually) you can purchase a bone white primal raptor mount from an NPC hiding in a cave on the island.   As an added bonus, people will be able to more easily identify you as crazy when they see you rocking this painful-to-farm raptor.

Skyscreamers

Right now, there is only one flying dinosaur mount in the game: the Armored Skyscreamer.  This guy is the reward for completely the Throne of Thunder raid meta, so if you’re not a hardmode raider, you may need to wait a few tiers to pick up this sweet ride.


Pet Dinosaurs

Of course, simply riding a dinosaur is not enough.  I mean, it is awesome, but not nearly as cool as riding a dinosaur, while your tamed dinosaur runs alongside you, keeping company with your battlepet dinosaurs, right?

Hunter Pets

If you’re a hunter, The Isle of Giants is where the magic happens.  Stable your active pets so you have lots of space for dinosaur shopping.

To tame a direhorn you will need to acquire an Ancient Tome of Dinomancy from the many Zandalari Dinomancers wandering about the island.  The mobs can be solo’d by the hunter, but you will probably want to pick up the Silencing Shot talent, as the heal they cast will put them back up to full health, making them a pain to kill without (they stop casting it once they reach 50%).  Once you get your book, though, you’re set: you can now tame any of the triceratopsy young direhorns on the island, regardless of your spec.

To tame a devilsaur, you just need to be Beast Mastery spec, no book required.  There are quite a lot of different colours on the island, so just find a young one in whatever shade you desire, and tame away.  Easy!

To tame a skyscreamer, whine to Blizzard because right now you can’t.

Non-combat Pets

While you’re on The Isle of Giants looking for your hunter book, you might be lucky to find one of the four new vanity/battle pets from the Zandalari Dinomancers:

Zandalari Kneebiter
Zandalari Anklerender
Zandalari Footslasher
Zandalari Toenibbler

Zandalari Kneebiter

These are little armored baby raptors.  They are super cute and completely unique from the old raptor vanity pets.

New in 5.3:

•  Stunted Direhorn – Unfortunately, it looks like you’ll need to win 250 PvP pet battles to get this cutie.
Direhorn Runt – Is a rare drop from the Direhorn mobs found on The Isle of Giants.
Pygmy Direhorn – Is now a rare drop from Horridon!

Dec 14 2011

LFR Tool: Raiding Lite™

The new Looking for Raid (LFR) tool is a new avenue of advancement introduced in 4.3 for characters.  Out for a few weeks, the feature has had enormous popularity with players.  For those of you who haven’t experienced it yet, here is an overview based on my experiences using it.

LFR is raiding with training wheels.  To compensate for throwing a bunch of strangers together, many of whom will be inexperienced or underskilled or just bad as following directions, the fights are stripped down and tuned to be very, very easy.   They are designed to be successfully done provided at least half the raid is conscious and capable of following basic instructions, a difficulty level that is arguably necessary to ever get anything killed in such an environment.  As a result of their ease, they offer low quality loot — just slightly better than the new heroics — and lack the perks of regular raiding like achievements, epic gems and Valor-points-per-boss (LFR awards VP only for completion), or the ability to work on the tier’s legendary.

To use it, one queues through an icon on the menu bar like with random dungeons, and is automatically matched up with 24 other players.  It can be done multiple times a week (although you only have one chance at loot), and will not lock you from doing the raid on normal mode.

Organisation

The group is composed of two tanks, six healers and seventeen DPS.  The fights are designed to always use this same comp, so there is no need for dual spec or talent switching during the raid.

Raid leadership is on a volunteer basis.  To queue as a potential leader, one must check the box on the queuing window along with their usual role – same as is done for the LFD tool.  If the raid leader leaves, a new one is assigned from amongst the other volunteers.  Raid leaders get no special perks or powers and mainly exists as a way of saying “yes I will give any new people instructions if they want them.”  Unlike with a real raid group, here the leadership rarely is required to do anything different than any other raid member, although you shouldn’t volunteer for the job if you’re not interested in explaining the fight mechanics.

Players are in and out of the raid group constantly.  It is not uncommon for people to leave mid-fight, or to start a boss down a few people.  The tool is very efficient about replacing these people the instant a group leaves combat, but the fights as also easy enough that the empty spots are rarely a problem.  For this reason, no player should feel intimidated about having to bow out before a run is finished; it is possible no one would even notice.

Niche

LFR has such a huge scope of utility across all spectrum of players, that it’s hard to just pin as “raiding for casuals,” although this is the thing it is typically billed as.

However incomplete that statement might be, though, it is still very much true.  With the difficulty level so low, even someone who has never played in a raid environment can stumble through it successfully.  The tool is an amazing way to let players see the raiding content they might have not otherwise dared to try.  The DPS checks are minimal, and even a few stronger players can balance out a handful of inexperienced ones.

Additionally, with the [currently] very short queues for DPS and healers, players who don’t raid due to lack of time may also find LFR to be an exceptional tool.  Not longer do forays into raiding content require regularly scheduled groups and hours and hours of attempts learning new bosses and farming old ones.  Instead, these players can opt for a limited “demo” version of the raid instance on their own schedule as an alternative to seeing nothing at all.  Currently, both wings of Dragonsoul in LFR take about an hour each and with so many players in and out constantly, it is not harmful to your teammates if you need to bow out even earlier.

Another advantage is that LFR provides a way for all players, serious or casual, to have an opportunity to try raiding on an alt that they wouldn’t have otherwise raided on.   Whether you just want to get more familiar with that class, or take a break from your main, or practice with them for a potential re-roll, the tool can fulfill this niche.

The LFR tool can also be extremely helpful as a tool to help seasoned raiders become familiar with the fights in advance.  Although the stripped down nature make it nearly useless for learning the mechanics themselves, seeing even the basic version of the fight can be helpful in figuring out position, learning spawn points for adds, what that special mob or ability looks like visually, and getting a general feel for the way the particular fight works.  Instead of just watching that tankspot video, now you’re immersed in it, and you can control the camera angle and zoom yourself. Paired with a written guide or a video, I’ve found the LFR tool to be immeasurably helpful in understanding a fight.

Finally, let’s not discount the huge advantage LFR provides for gearing up new players, alts and rerolls and for filling in gearing holes on raiding characters.  It also allows for main raiders to get their set bonuses faster and get small upgrades more often, and the nerfed tier pieces will still work towards completing a set bonus.  Lastly, as a source of Valor Points, you might choose to get the currency to buy those VP items through LFR rather than LFD.  Although its steeper item level requirement means you can’t just waltz in as a fresh 85, the requirements can still be met by doing the new heroics rather than raiding.

Success Ratio

Queuing at least once weekly on four characters, I’ve had very good luck in terms of success with my LFR groups.   Most bosses take just one or two tries to down, with ample forgiveness for mistakes.  Trash wipes typically only occur when someone facepulls several packs or the boss itself (or both in the case of the slime boss).  The worst group I’ve encountered spent 45 minutes just on the first boss of part 2, which is still a good deal faster than a real raid might take, and they still went one to one shot every following boss.  In the best group, I’ve cleared part 1 of Dragonsoul in just over a half an hour on my lunch break.  The raid is definitely succeeding it its goal to be painless and easy.

Loot

You can roll on loot for each boss in LFR once per week. Once you’ve already beaten that boss, you will be ineligible to roll on loot from that boss again during the week if you continue to queue.  Many of the items are now limited to particular appropriate classes (ie, a rogue cannot roll on a strength sword).  Roll bonuses are given if you are ‘need’ rolling on an item for the spec you are queued as, so if a piece of intel/spirit mail drops, the resto and elem shaman will have an advantage on it over the enhance spec’d one, but the enhancement shaman may still roll for their offset without worrying about the item getting dusted.

The system is far from perfect and is still peppered with bugs and oversights, but overall it is a large improvement over LFD.

Attitudes

Just as any environment in which anonymous strangers are thrown together and forced to interact, LFR certainly contains its share of jerks.  Every group has the one DPS who spams Recount after every attempt to brag about his numbers, and the other guy who spends more time bitching about the weaker DPS than he does doing his own job.  You do encounter those two people who get in a fight over something petty and insist on holding up the entire raid so they can bicker over it.  And yes, there is the guy who tries to publicly shame anyone who makes a mistake or taunt everyone who dies with “newb!”   There are also people who are abusing the system by joining then going AFK, and those lazy people that don’t want to help with trash or run back after a wipe.

However, I have been largely impressed by the bulk of groups.  For every asshole throwing a tantrum, there are three people telling him to shut up.  I have encountered players who have made special effort to explain the fights to the people that ask, who give helpful call outs and reminders, who present solutions instead of complaints.  There are those people who are cheerleaders and in the face of others bitching can say, “we were really close, we can do it, we just need to be a little more disciplined.”   There have been people who win duplicate loot and gracefully hand it out to the second highest roller.  I have seen more people booted for being a jerk than I have for making mistakes or doing low DPS.

Overall, I’ve found it to be a smoother and more enjoyable experience than doing PuG five mans.  The jerks are diluted in a sea of people, and the bad players don’t hurt the raid’s success and there are always at least a couple good and patient players to help teach the inexperienced what to do.

My conclusion on LFR is that it is a wonderful tool that many people will find useful and/or enjoyable.  Since it is only a few weeks old, I suspect that once the novelty wears off and people are capped on valor goodies, the demand for running it will decrease and queue times will grow.  Nevertheless, it is reasonable to believe it will still be one of the most popular game features Blizzard has ever implemented in WoW.   Love it or hate it, the thing is clearly a hit.